Table of contents
- Prerequisites
- Blinking on board LED
- Performing some basic Python operations
- References
Prerequisites
- Before validating the flashed firmware we must flash the MicroPython application firmware,for which you can follow my previous blog
- To access the prompt over USB-serial you need to use a terminal emulator program. On Windows TeraTerm is a good choice, on Mac you can use the built-in screen program, and Linux has picocom and minicom.For example to install picocom on Linux you can run:
sudo dnf install picocom
- Changing permissions on serial ports:
Use this command to change permission-
sudo chmod 666 /dev/ttyUSB0
Blinking on board LED:
For flashing the on board LED we will first have to locate the port number and GPIO pun number associated with the LED on your board,which you can infer from your board schematics found in design files. In case on BeagleConnect Freedom the PORT number is A i.e 0 and the GPIO pun mumbers are 14 and 15.We will be blinking the LED associated with GPIO pin number 14 for this illustration.
Starting off please enter into the terminal emulator program by running the following command :
picocom /dev/ttyUSB0 -b115200
This will make REPL available for usage.You can follow the follow commands form the pictures to blink the on board LED indefinitely.
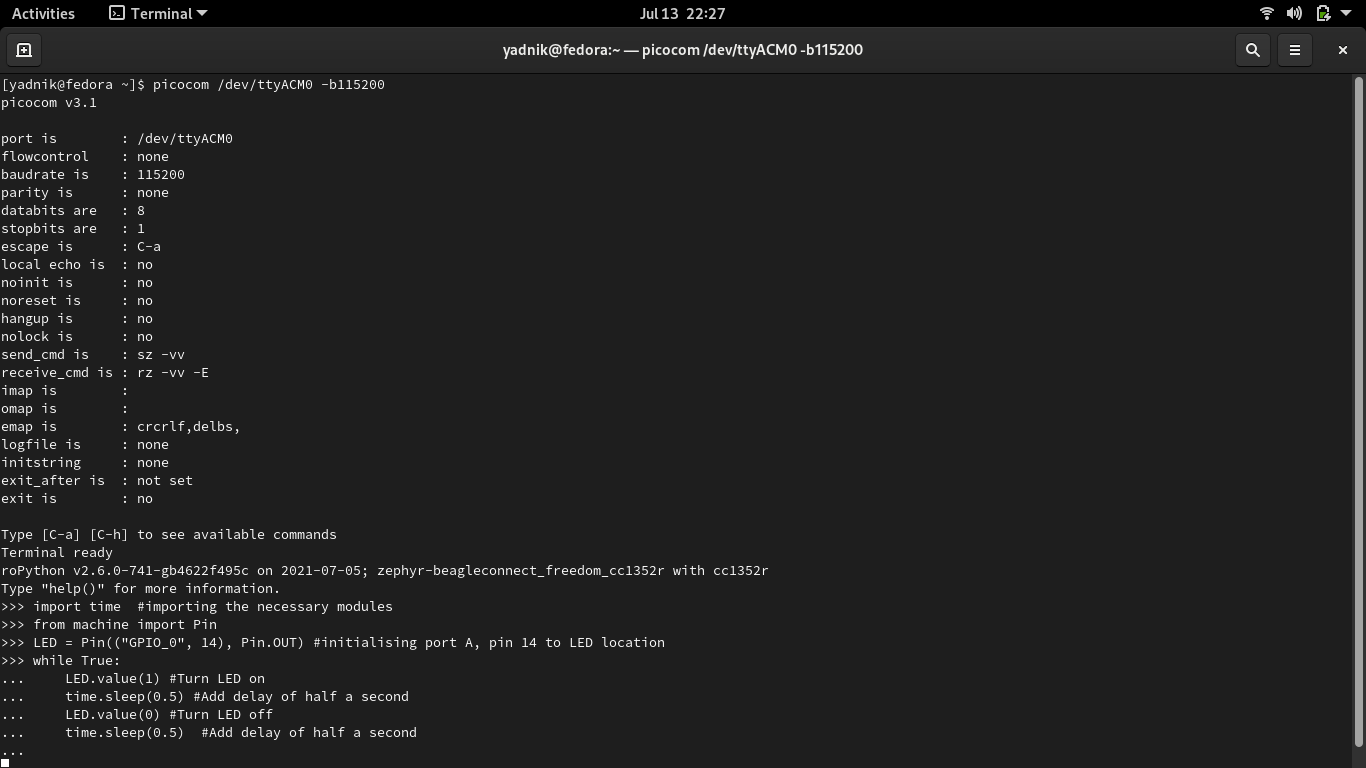
Note:Once you are done typing out the program press backspace followed by enter for the blinking to initiate.It will look similar to this:
https://www.youtube.com/watch?v=KB1giV3791Q
Performing some basic Python Operations:
To validate the flashed firmware we also perform some basic python operations on our BeagleConnect Freedom board,as seen from the image.
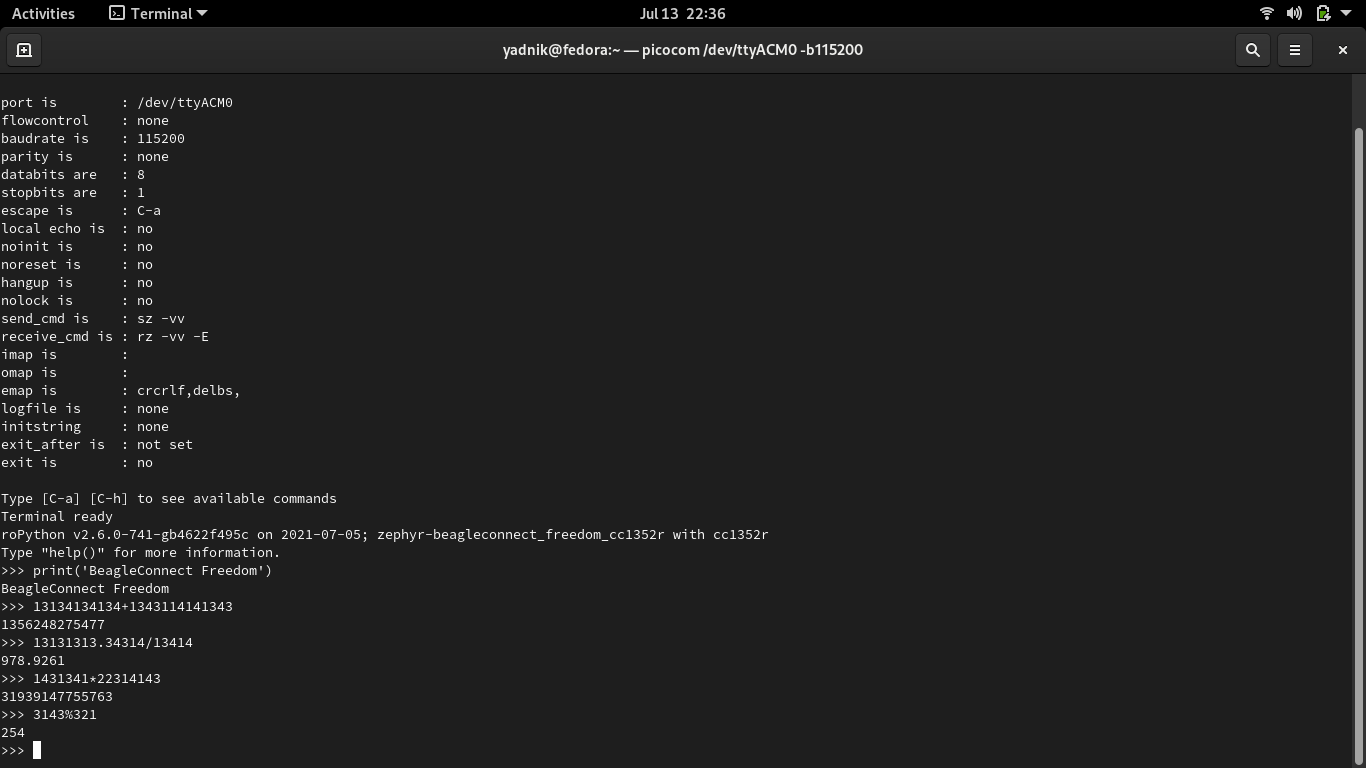
Hence we conclude the flashed application firwmware performs all the operations as expected and can be used for furthur applications.
References:
https://github.com/micropython/micropython/blob/master/ports/zephyr/README.md https://github.com/jadonk/beagle_connect_zephyr_board