Table of contents
1)The BeagleConnect Freedom
2)What is MicroPython
3)Setting up Zephyr RTOS
4)QEMU
5)Building port on Zephyr RTOS
6)References
The Beagleconnect Freedom
BeagleConnect is a revolutionary technology which eliminates low-level software development for IoT and IIoT applications, such as building automation, factory automation, and home automation. What sets it apart is that it eliminates the need of relying on software libraries enabling it to be used for interfacing a greater number of sensors, actuators and indicators for communicating over various networks compared to other conventional solutions. This can be achieved since it is built with fully open source software with submissions to mainline Linux and Zephyr repositories to aide in support and porting.
BeagleConnect Freedom wireless hardware is based on the TI CC1352 and is multiprotocol and multi-band Sub-1 GHz and 2.4-GHz wireless microcontroller (MCU).The first available BeagleConnect solution. BeagleConnect currently has Greybus support which is an application layer protocol that can be described as a bus transport, in that it conveys bus-specific messages back and forth between Linux and a connected device.
The motive of this project is to port MicroPython and CircuitPython to the firmware to be flashed on the BeagleConnect Freedom as well as writing MicroPython drivers for the the BeagleConnect Platform. In this Blog we will explore the building process for the Zephyr RTOS which basically one step prior to the process of flashing it on the hardware.
What is MicroPython?
MicroPython is a lean and efficient implementation of the Python 3 programming language that includes a small subset of the Python standard library and is optimised to run on microcontrollers and in constrained environments. Features supported by the MicroPython Port to Zephyr RTOS are:
•	REPL (interactive prompt) over Zephyr UART console.
•	utime module for time measurements and delays.
•	machine.Pin class for GPIO control, with IRQ support.
•	machine.I2C class for I2C control.
•	usocket module for networking (IPv4/IPv6).
•	"Frozen modules" support to allow to bundle Python modules together with firmware. Including complete applications, including with run-on-boot capability.
•	virtual filesystem with FAT and littlefs formats, backed by either DiskAccess or FlashArea (flash map).
Setting up Zephyr RTOS
I have used the fedora distribution and will be sharing commands for the same. However documentation and support is available for Ubuntu, Fedora, Clear Linux, Arch Linux along with Windows and macOS. The following steps need to be followed. I have shared the respective commands for the corresponding steps.
1) Update Your Operating System:
Ensure your host system is up to date.
$ sudo dnf upgrade
2) Install Requirements and Dependencies:
Note that both Ninja and Make are installed with these instructions; However we will need only one.
$ sudo dnf group install "Development Tools" "C Development Tools and Libraries"
3) Install CMake:
CMake version 3.13.1 or higher is required. Download and install a packaged cmake from the CMake project site.
$ cd ~
$ wget https://github.com/Kitware/CMake/releases/download/v3.15.3/cmake-3.15.3-Linux-x86_64.sh
$ chmod +x cmake-3.15.3-Linux-x86_64.sh
$ sudo ./cmake-3.15.3-Linux-x86_64.sh --skip-license --prefix=/usr/local
$ hash -r
4) Install the Zephyr Software Development Kit (SDK):
Use of the Zephyr SDK is optional, but recommended. Some of the dependencies installed above are only needed for installing the SDK. Zephyr’s SDK contains all necessary tools to build Zephyr on all supported architectures. Additionally, it includes host tools such as custom QEMU binaries and a host compiler.
Download the latest SDK as a self-extracting installation binary:
$ wget https://github.com/zephyrproject-rtos/sdk-ng/releases/download/v0.12.4/zephyr-sdk-0.12.4-x86_64-linux-setup.run
Run the installation binary, installing the SDK at ~/zephyr-sdk-0.12.4
$ cd <sdk download directory>
$ chmod +x zephyr-sdk-0.12.4-x86_64-linux-setup.run
$ ./zephyr-sdk-0.12.4-x86_64-linux-setup.run -- -d ~/zephyr-sdk-0.12.4
We are now done with setup and installation process.
QEMU:
QEMU is a generic and open source machine emulator and virtualizer. When used as a machine emulator, QEMU can run OSes and programs made for one machine (e.g. an ARM board) on a different machine (e.g. your own PC). By using dynamic translation, it achieves very good performance. We will be also using it for running the Zephyr RTOS and building MicroPython for the ARM Architecture on our x86 machine which can be later flashed on our actual hardware.
Building port on Zephyr RTOS
We don’t have to redo the Zephyr installation, we have to just switch from master to a tagged release, we can instead do:
$ cd zephyrproject/zephyr
$ git checkout v2.5.0
$ west update
Once Zephyr is installed we may then need to configure your environment, for example by sourcing zephyrproject/zephyr/zephyr-env.sh
Once Zephyr is ready to use we can build the MicroPython port.
We will first have to clone the MicroPython repository into our home directory using
$ Git clone https://github.com/micropython/micropython
To build for QEMU we finally run
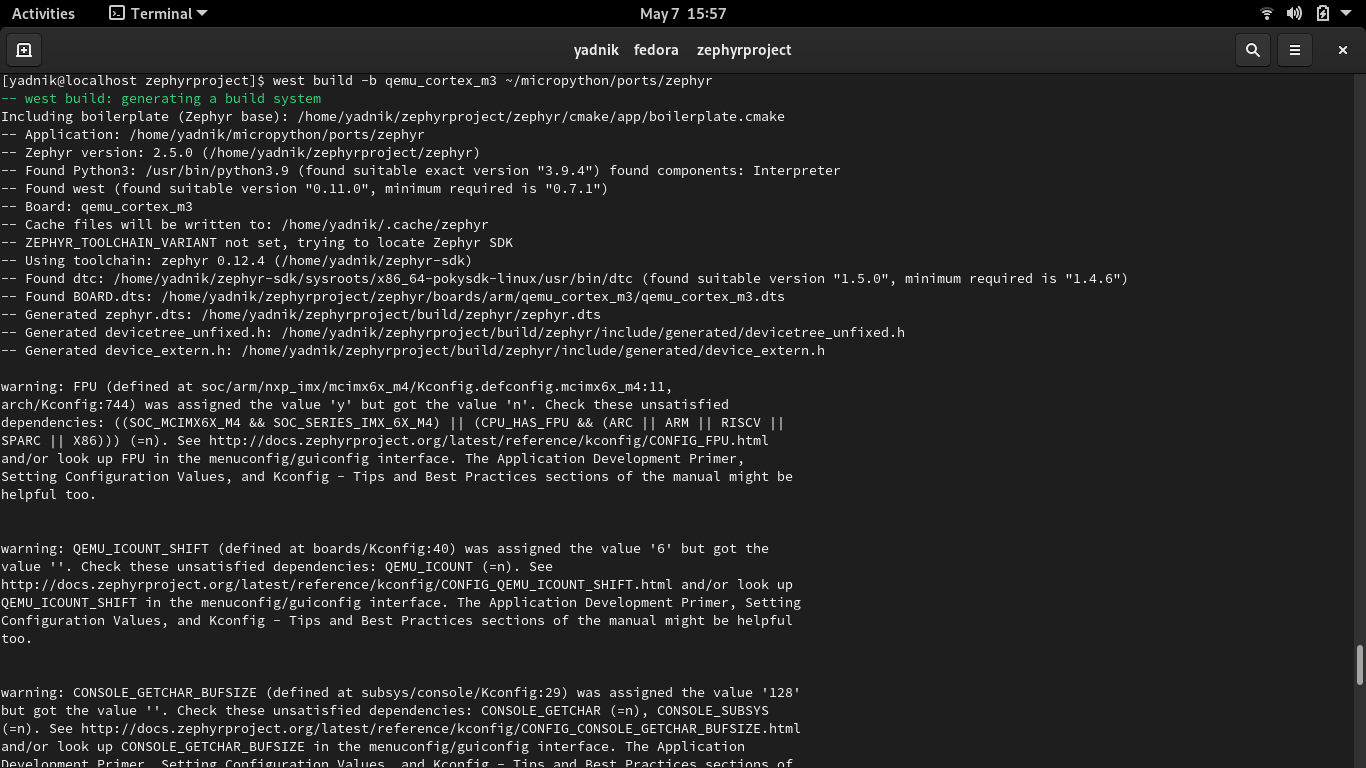
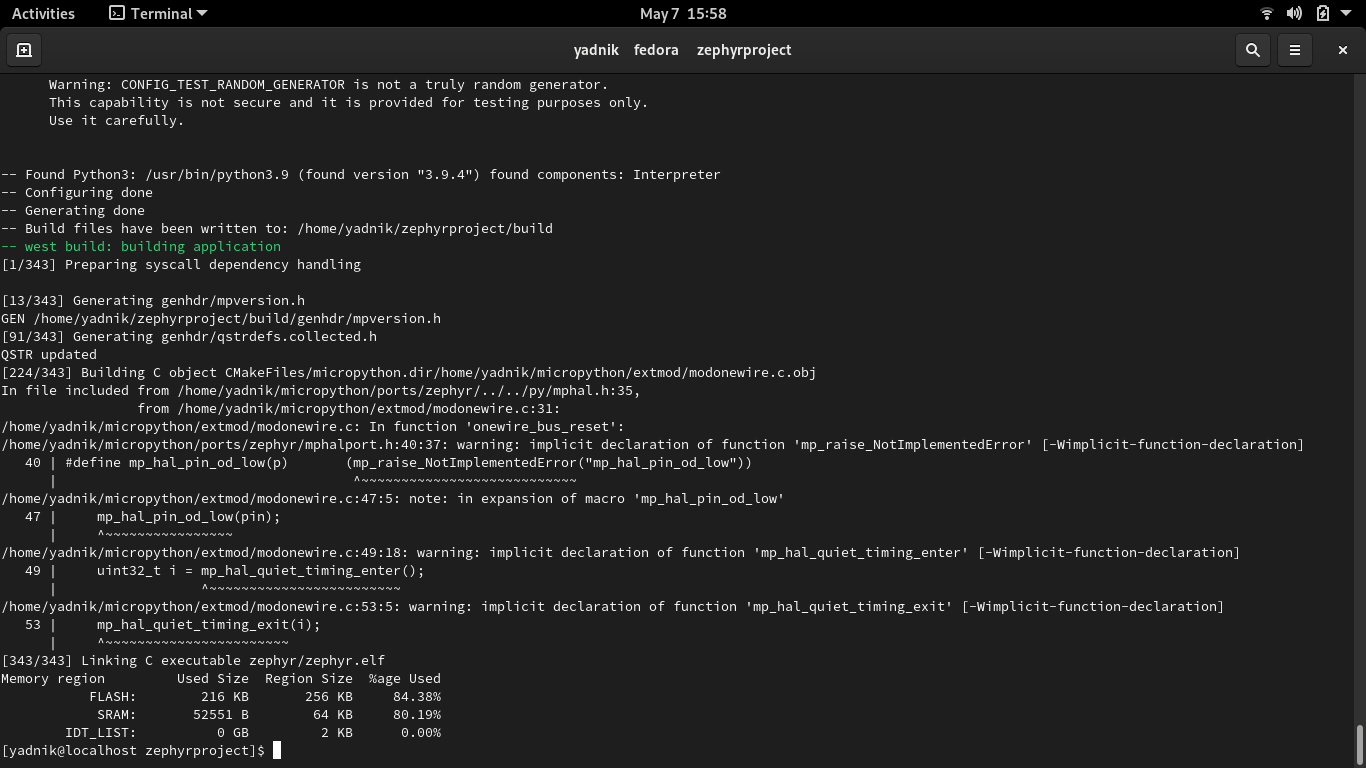
$ west build -b qemu_cortex_m3 ~/micropython/ports/zephyr
Once the port has been built successfully the resulting firmware is flashed to the BeagleConnect Freedom Board. A successful build looks as follows.

References
https://github.com/micropython/micropython/blob/master/ports/zephyr/README.md https://docs.zephyrproject.org/latest/application/index.html https://docs.zephyrproject.org/latest/getting_started/installation_linux.html https://github.com/micropython/micropython